Starting out in sound production? Here are some top tips from Vanny and Christa.
Each month, Vanessa Flores & Christa Giammattei get together for a livestream chat based on what their communities vote for. This month, they focus on the hardware and software for that first starting out in sound production and share reams of valuable inside information for working in post-production, relating to everything from tips and tricks to specific techniques and equipment recommendations.
Read the summary below or watch the full video!
- What Gear to Buy First
- Headphones vs Studio Monitors
- Closed-back vs Semi-Open Headphones
- Monitor Sizes & Room Treatment
- Where to get cheaper audio gear
- How to start doing Foley
- Best Tools for Foley
- Top Tips for Foley Recording
- Choosing an Audio Interface
- Choosing a DAW
- Should I Work at 96KHz?
- Should I keep or delete client files?
- How to look after your ears
- Overcoming Sound Design Writer’s Block
If you were starting out in sound production over again, what pieces of gear would you get for yourself?
Vanny: Having a really robust, reliable, dependent computer.
If you plan on being portable at all, maybe a laptop might be better for you. But definitely invest more in a computer that’s going to last. Essentially, have something really reliable, dependent, and with good battery life if you’re going with a laptop. I feel like it would have cost me a lot less headache down the road.
Christa: I agree on that front.
I had a PC initially, and it did not last me, maybe a year and a half, two years, and it crashed with a blue screen all the time. Eventually the hard drive just completely failed, and back then, as a newbie, I hadn’t backed up anything. I lost years of projects. So I moved to a Mac and I’ve been on a Mac ever since then and I’ve had way fewer problems.
Headphones or studio monitors?
Vanny: Headphones all the way
And the reason is that it’s in a more controlled environment. If you’re only just starting out in sound production, you’re most likely in your bedroom and it’s probably not the most acoustically optimised or treated. Headphones are a consistent playback reference and are portable; you can take them everywhere and use them for many different things for recording.
Good monitors are expensive and are not as accessible when you’re first starting out. Just keep making “best bang for buck” purchases and then you keep upgrading.
Headphones can get pricey, but if you have some that you know really well and you know how sound translates on various playback mediums, I think any headphones can do. However, I really recommend Beyerdynamics, either the 770s or the 990s.

Christa: Headphones!
You can get fairly decent headphones for around $100 to $300, whereas for monitors, it’d be like $300 per monitor to get the equivalent sound. My first pair of headphones were the Sennheiser HD 280 Pros. Those are $99 and they’re surprisingly flat, pretty accurate and true to the mix.
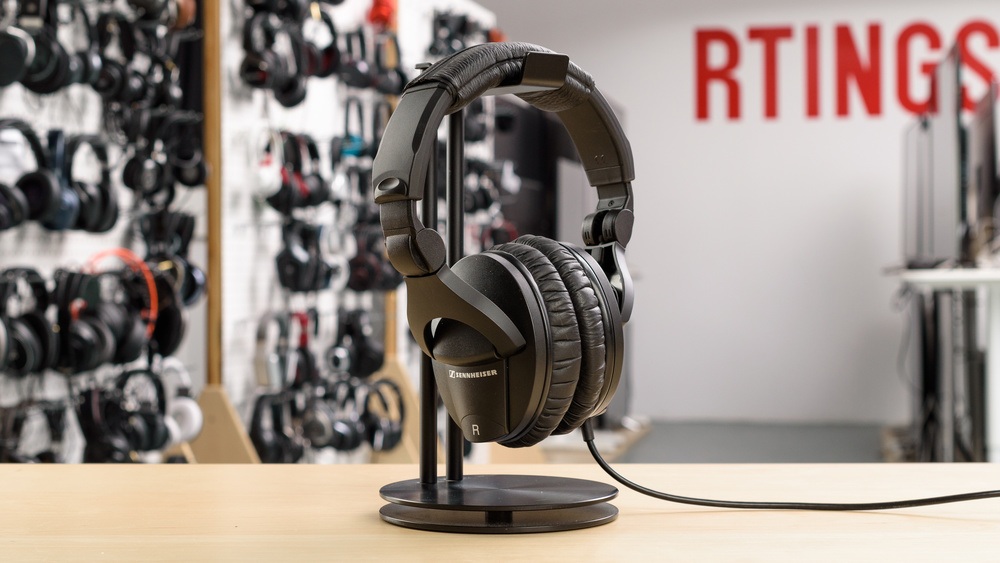
They’re really great for tracking because they’re closed headphones. They can get a little uncomfortable because they’re very tight. But if you’re recording or tracking or doing field recording or anything like that, they are dual purpose as they’re fairly good at mixing, and you can also use them for the field.
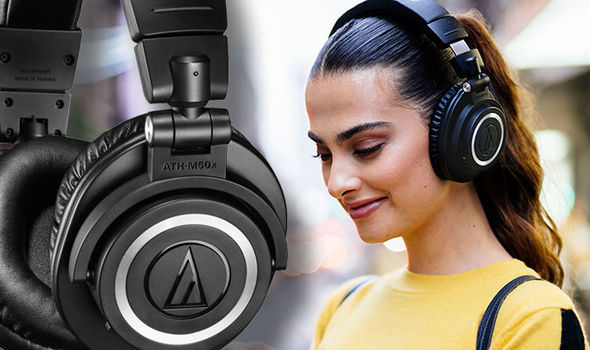
Another option is the Audio-Technica, M50x. They’re similar, but they’ve got more low mids to them, which is just something to be aware of.
Vanny: You’ve really got to look at the frequency response chart. It’s very important for any kind of gear you get. Another one I’ll throw out there: I can’t personally vouch for how great it is, but it’s Fluid Audio: this is a really budget entry. I think it’s about $60, but it also comes with its own EQ correction software, so you don’t have to get something external like Sonarworks or anything like that.
If you have an EQ correction software, Sonarworks is really helpful, especially if you’re working out of a bedroom studio when you’re just getting started. That can get you on par with a much better system.
Christa Giammattei
It is really hard to get monitors when you’re just starting out in sound production because you do have to pay a lot of money to get pretty decent monitors, in my opinion. Not to say the KRK Rokits are bad or the Yamaha HSs are bad, you just you have to be aware of what each monitor sounds like.
If you do plan on getting monitors and things like that, make friends with your local music retailers. They work off commission and they want to help you because they want to sell, and will offer discounts on things; they do have the power to do that.
Closed-back vs. semi-open headphones
Christa: I don’t think semi-open headphones are bad.
You can hear a little bit more of your environment if you’re mixing in a louder area, so if you have an apartment or something, they’re a little bit difficult to work with because you’re constantly distracted by all the sounds around you. But for the price, they’re not bad and they are pretty flat, so they have a pretty good response.
Vanny: I personally don’t believe in semi-open headphones
Because you get the worst of both worlds. Open-back headphones are mainly for mixing, so it’s easier on the ears for more detailed stuff. But closed-back has the obvious advantage of isolation. So, if you’re in an area where you don’t want bleed from your headphones when you’re tracking things, you should commit to one or the other. I think it’s better to have two if you wanted to have one dedicated, but if I know I’m going to be recording a lot more in environments where I don’t want the bleed from my headphones coming out, just go with closed back and then learn those.
Monitor sizes and room treatment
Christa: For me, I have a small amount of room treatment – I just learned my monitors…
…And I learned what a good mix sounds like in my room. There will be things that you have to learn and sacrifice until you’re able to get really great room treatment.
With the Yamaha HS Series, for example, the sizes go 5, 7, 8. There’s a night and day difference between the HS5 and the HS7. It sounds like a completely different brand. The HS8 sounds similar to the HS7, except they have more “oomph” to them.

Vanny: With certain monitors, sometimes when you’re listening to the music mixed with the dialogue, everyone would say, “can you bring the music down?” but when you listen to the monitors I was mixing on and just with the translation stuff, it wasn’t that loud. It’s just a little bit more bass peeking through.
Christa: Some people like the HS5s a lot because they are very flat, and I think some people use them kind of like the Avantone Mixcubes, so they purposely sound like ass because theyre very revealing for your mix. Like if you play a mix through the Avantones, a lot of times it’s very apparent what’s missing because you’re like, “well, I can’t hear the guitar” or “I can’t hear if you’re doing sound design”, “I can’t hear the footsteps at all”.
Where to get cheaper music gear when starting out in sound production?
Vanny: Reverb.com.
I was able to get a lot of gear from Reverb, which is kind of like eBay but for music retail. You can get almost everything used, and I still do it because I’m too cheap to get rid of that habit. Reverb is a great website, sometimes you can make offers, so it’s like a bid kind of thing, but definitely check it out. I bought all my mics, interfaces and monitors used…just not my headphones. You have to wear those!
How should you do Foley when just starting out – what sound libraries can you suggest?
Vanny: It depends on your needs.
Do you want to be fast? Do you want to have everything authentically original? For me, I love Foley, but I never perform it. And if I do it is stuff that I can easily do, like plastic bags – your everyday props.
Things like Soundly Pro or even SoundQ have a subscription with their own library managers, so you can go far with those and use some creative pitch shifting or time-shifting to have more variation of the same sample. Just do some cool editing, like take the tail of one and attach it to the head of the other etc. I did a whole feature film fully just off of a library – so it’s possible!
Christa: subscription plans.
Although subscription can get frustrating, it is really useful because you’re able to get access to a really large library, even if you just need it for a month or two, you can cancel your subscription and get it again for another film. So that could be a really easy, low-cost way to get access to a tonne of sounds for $9 or $10 a month or $15 a month.
Best tools for Foley
Christa: Get a cheap field recorder.
A Tascam or something like a portable recorder and use it everywhere. Because once you build your own sound libraries, you’ll be surprised at how helpful that can be. This is a valuable skill to learn when starting out in sound production.
There’s a lot of libraries that don’t have certain sounds so record everything. footsteps, go out in the snow, record a snowball, record your clothes, moving, recorded breathing, record all of that. It’ll take you something like an hour a week and in the end, you’ll have a huge library of Foley rustles and footsteps and things that you can utilise in all of your work.

Top tips for Foley recording
Vanny: Record in mono!
Or at least make it mono when cutting it in. Another thing too, which I think runs for like $99, maybe $100, is the Edward Foleyart Instrument; it’s a huge time saver. If you’re doing Foley and you’re doing footsteps for a show, it’s a MIDI player, that plays footsteps and has all these different types of shoes and all these different types of surfaces and performances of running, walking, jumping and scuffing, which is really important. And it’s $99. I think it’s a worthwhile investment.
Christa: Reformer Pro by Krotos
Reformer Pro just saved my life on a project! I used it for footsteps, it was great.
Vanny: I don’t really use it for footsteps but for clothing, I found it was really good because you can have different types, like nylon, or just regular cloth-y kind of sounds with leather or whatever you want it to be. And then you just have it on one track, and then you can use the X-Y axis to adjust it to how you want it to sound, and then it takes a live input from your voice. I just kind of rub the microphone in kind of performance with what we’re seeing on screen. It usually works really well. And so those are just ways to be faster, but it’s still somewhat authentic and you still perform it if you’re able to afford things like that. I’m not sure how much Reformer Pro is.
Christa: I use it for footsteps and recently I found that they have to be at least a second long. So if each of your footsteps are cut really small, I had to go in and manually lengthen them. I did that even though it’s kind of time-consuming, but it still is less time than actually lining them up on the timeline. But I found out that it’s much easier if you are using Reformer Pro, because as you were saying, there’s an X-Y axis, so there are essentially four sounds that you can add and you can move the dot into whatever combination of those four sounds you want. So, for sound design, it’s really great.
For Foley, it opens up a lot of possibilities. I would add two or three libraries of footsteps, like rustling sounds. Put the plugin on the track and talk into it, it’s essentially like taking the transients of whatever sound you’re putting into the microphone and morphing it into those sounds that you have loaded. So, you can get a really nice combination of leather movement and Foley and footsteps and things, and you can match your voice on the screen in one take.
Vanny: Reformer Pro gets rid of all that set-up time, like auditioning which prop you want to use, and then figuring out the placement and just doing all these tapes and then having to clean it up because I’m sure if you’re doing it in your bedroom, there’s probably some noisy floor behind you. It’s a nice, clean way to do it. When it comes to props, I feel like you have to get them; either you have to record them or you have to find them from a library.
Do you have a recommendation for an interface that you would start out on?
Vanny: the Focusrite Scarlett Solo.
It’s the cheapest one on the market. Is it the greatest? No, but it does the job and right now I rock the Clarett 2Pre. However, I hear really good things about the Motu 2i2s and so maybe that’s something worth looking into, just depending on budget. I never use the Apollo twins.
Christa: They are expensive. You don’t need something like that. For the price in terms of interface preamps you can get a very similar sound with a Focusrite, especially like a Clarett, because they do have pretty clean preamps. I don’t know if you need to spend that extra dough, especially if you’re starting out in sound production. My first interface was the Focusrite and it was a 2i2 – I still have it and it still works. And that was nine years ago.
I upgraded to the Clarett 4 Pre. I do find that it is very clean and very nice. However, I will say for some reason I feel like the Claretts lack gain. I think the Focusrite Scarlett’s are a great place to start on a budget.
As a beginner, ‘starting out in sound production’ interface, especially for doing sound design, you don’t need more than one or two inputs, ever. You’re mostly using them for monitoring as opposed to recording.

When you’re starting in sound design, what DAW would you recommend?
Vanny: Go with Reaper
You can pay $60 for it but it’s technically free because the evaluation licence is pretty much indefinite if you don’t want to spend the money. If you’re going in just wanting to learn the craft, any DAW will do. Use whatever you have available. If you don’t have anything available, I think Reaper is a great one to start in.
However, if you’re really being serious and want to do post audio or work at a studio, you have to see what they’re using and most of the time it’s going to be Pro Tools. Once you’re at a point where you can invest, invest in the Pro Tools Studio as it has more features and it’s a little bit less. But it’s a good one to start and learn that way. But to make yourself employable and for actual skills, any DAW works.
Christa: Reaper
As time goes on, I would say specifically for sound design, the DAW that you use is becoming less important. So, Reaper I think is definitely a great place to start. If you are working with a lot of studios, I would get familiar with Pro Tools ASAP, though. A lot of studios still work in Pro Tools and they do have a subscription. Pro Tools Studio now runs in 5.1, So, if you need to mix in 5.1, you can still get it with the Studio subscription, which is really nice.
I have been using Reaper for sound design a lot more because I feel like the layout makes a lot more sense. But for mixing I still use Pro Tools because I feel that the layout makes a lot more sense. But I do really like Reaper and I like a lot of the things that you can do with Reaper and it’s more customisable. Obviously, sound design is all about customising sounds so, for that, it’s worth it for the price and you’re not paying $1,000 a year. Ultimately, it’s like a preference thing for DAWs, but I will say that probably you’ll end up on Pro Tools because that’s just what so many studios are using.

Vanny: Yes. Especially if you’re freelancing, and you’re only doing parts of it. Like not the whole post audio, just doing the sound effects or just the dialogue editing. Most likely who you’re passing it off to is going to be on Pro Tools.
Christa: And you also have to be mindful of when you are in that situation when you’re passing stuff off; if you’re the dialogue editor and you’re sending the session to the mixer. When you get into that kind of level of mixing, if the mixer pulls in your stuff and there are issues with files or things are out of time or are missing, that slows everything down. So sometimes it’s just easier to be working on Pro Tools so that you know that everything is going to mesh and be fine because your mixer is using Pro Tools.
The Pro Tools subscription model change has been a huge topic of discussion lately. And while there are definitely a lot of things they did wrong, I do feel like there are some things they did right, too. I think it’s definitely more accessible to people that are just starting, especially with the new Pro Tools version. That’s like $9.99 a month. You can really get that and have the opportunity to learn Pro Tools. Whereas before Pro Tools First was useless because you can’t do anything with it.
Does a 96KHz sample rate give more flexibility?
Vanny: Yes
You get fewer artefacts when editing and pitching. As a post audio engineer, I appreciate it when something can be a 96KHz, especially if I’m trying to time-shift. I get fewer artefacts, but in general, when you have stuff in 96KHz, it takes up more space. So, if you have libraries, that are all 96KHz, you have like hundreds and hundreds of GBs, whereas 48KHz is less storage, so it’s a balance.
To delete or keep client files?
Vanny: Always archive them.
They will come back. And if they don’t, I think it’s still good to have, in case you remember, “oh man, I was mixing the scene and I solved it a certain way. How did I do that again?” You can just open up that session and see what you did.
Always make a save copy! I don’t know how many times I burned myself where when I didn’t save everything from the session in a folder to keep all the audio files contained. I’ve lost so much stuff that way.
Christa: I don’t ever delete them.
It takes up so much space, but I don’t ever delete them. I do archive them though. I have like a main solid-state drive that I work off of. All my current projects are on that. It’s in three places so I know that it’s there if I ever need it. And I won’t have it on my current operating solid-state drive after six months, I will move it in that regard. And then once that drive fills up, I get a new drive and I put that drive away.
Vanny: Do cloud backups. I don’t know how many times I’ve been approached years after saying, “hey, I’m doing a recut of the film, can you do this” or “hey, I got it to so-and-so streaming service. They need these stems, can you bounce them?” So, I think if you really want to make yourself look professional as a service, definitely keep everything.
You could even offer it as an upsell to the client, “hey, I’ll give you the Pro Tools archival session or all these stems for an extra charge” and then it’s on their drive. They shouldn’t have the excuse that they need it. So that’s something to pitch, it doesn’t cost you anything.
How best to look after your ears
Vanny: Take breaks
Find an increment of breaks that works for you. This can also help tighten any productivity breaks. I heard the actual greatest breaks you can take are not actually every 20 minutes or every hour or whatever, but you learn your own natural flow.
It helps your ears; take a walk, just don’t listen to anything, and don’t put on headphones in that break. Just really give yourself that time to settle. Also, don’t monitor at a loud volume. Just try to keep that discipline throughout your work life. I think it’s important if you can get check-ups on your ears and kind of see where that’s going.
When starting out in sound production, the passion and excitement can lead to long sessions, but it is so important to take breaks.
Christa: Ear protection.
I literally carry around headphones, like earbuds, everywhere. They actually lower the decibel that you’re hearing, but you can still hear everything. They cut down on those really harsh frequencies. You can get them from Amazon for $20, or $30 and they come in a little case. Get those and bring them everywhere.
How do you overcome sound design writers’ block?
Vanny: References.
Get inspired. Let’s just say you’re doing sound design for car commercials. Go listen to some car commercials. Really take notes about what exactly you’re hearing. Close your eyes and write down what you’re hearing and then try to emulate that. And in that, you’re going to find your own voice. When I get a lot of writer’s block or I’ve been given a brief and I don’t know where to take it, I just go listen and find some inspiration.
Christa: Don’t be afraid to do different things that you’ve never done before.
When I’m having weird writer’s block, I watch things that I know I find satisfying, and I try and piece together what that has that I can’t figure out at that moment. Something that helped me a lot when I was first starting in sound design was I had this very strange fear of failing or doing something that didn’t sound good and it prevented me from putting sounds in that are just sound design vomit.
But those are the times that you have your greatest ideas and your greatest moments when you’re just making stuff up. That’s when you find and discover something that is going to be amazing. So, my advice would be don’t be afraid to do different things that you’ve never done before, to throw things into plugins that you never would have thought of. Don’t be afraid to fail. The reality is, that is how you grow as a sound designer – just do a bunch of stupid stuff. When starting out in sound production, or late into your career, don’t be afraid to try new things or things that you would have never thought of before!
We hope this guide to starting out in sound production is valuable to you, and offers some great tips on gear, professionalism and more. Thanks to Christa and Vanny for letting us into a truly insightful conversation this month, and for letting us share it with our sound community. We look forward to learning more next month!
Want more advice on how to get started? read our top tips for getting started in sound design
More content from Christa and Vanny
Read our Interview with Christa Giammattei Here
Read our Interview with Vanny Audio Here
See Christa’s Top Tips for Animation Here